Spring Into Summer
This Tutorial is solely my own creation, any similarites to another is purely coincidental.
Thank you Linda for allowing me to use your beautiful Tubes.
You can find more of Linda's Tubes by clicking on her banner below
Thank you Linda for allowing me to use your beautiful Tubes.
You can find more of Linda's Tubes by clicking on her banner below

Supplies - HERE
LF-WomanButterflies-07032013
LF-FlowersField-070314
cg-butterflyline-9314-1203
Font Shangrilar - Window 7 users will need a font viewer Header Image for preview purposes only
Plugins
Bkg Kaleidoscope - Flower
Bkg Kaleidoscope - Mirrored & Scaled
Bkg Designer SF10 III - Spryo Zag
AP Lines - Lines Silverlining
Toadies - Mosaic Blur
Notes
Save your plugins to your plugin folder before opening PSP
Save font to your font folder
Open all tubes and minimise for now,
Step 1
Open new canvas,
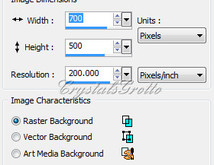
700, 500 200.00 Raster Background
Change Foreground colour to #eef6e0 and Background to #43581a
Make Foreground Gradient
Change Foreground colour to #eef6e0 and Background to #43581a
Make Foreground Gradient
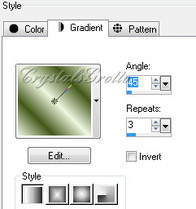
45, 3 Invert unticked. Linear
Flood fill canvas with gradient
Step 2
Maximise LF-FlowersField-07032014 Making sure your on 'Tube' Layer Edit copy, close original
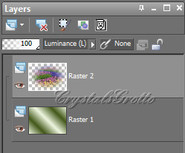
Back to canvas, Layer, New Raster Layer Selections Select all, Edit paste into selection
In your layers palette change blend mode to Luminance (Legacy)
Flood fill canvas with gradient
Step 2
Maximise LF-FlowersField-07032014 Making sure your on 'Tube' Layer Edit copy, close original
Back to canvas, Layer, New Raster Layer Selections Select all, Edit paste into selection
In your layers palette change blend mode to Luminance (Legacy)
Selections Select None,
Layers Merge, merge down
Step 3
Effects Plugins - Bkg Kaledoscope - Flower - Apply
Layers Merge, merge down
Step 3
Effects Plugins - Bkg Kaledoscope - Flower - Apply
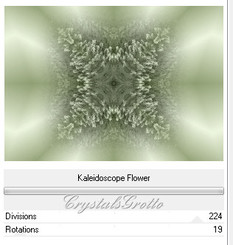
224, 19
Effects Plugins - Bkg Designer SF10 III Spryo Zag - Apply
Effects Plugins - Bkg Designer SF10 III Spryo Zag - Apply
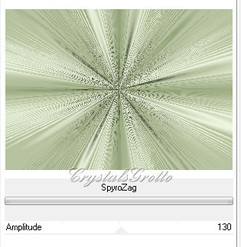
130
Effects Plugins AP Lines, Lines Silverlining - OK
Effects Plugins AP Lines, Lines Silverlining - OK
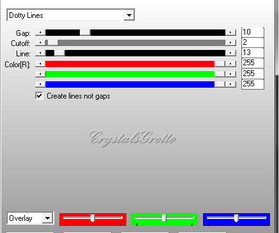
Dotty Lines 10, 2, 13, 255, 255, 255, Overlay
Step 4
Selections tool, Custom Selection
In the pop up box type in the following Top-0, Left-325, Right-375, Bottom-500
In your layer Palette, right click on Raster 1 Promote Selection to layer - Don't worry that you can't see anything at the minute, you will soon
Selections, Select None,
Effects, Plugins, Toadies, Plain Mosaic Blur - Apply
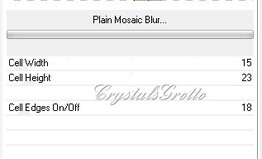
15, 23, 18 Effects Geometric Effects, Spherize
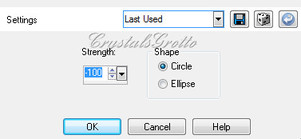
-100 (minus) Circle checked. OK
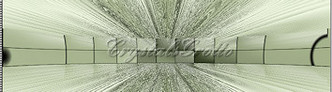
Image free rotate, Left 90 Degrees all layers unchecked
Pick tool, (raster deform in PSP 9) Pull sides centre nodes out to the far sides (see image below)
Image free rotate, Left 90 Degrees all layers unchecked
Pick tool, (raster deform in PSP 9) Pull sides centre nodes out to the far sides (see image below)
Effects, 3d effects, drop shadow
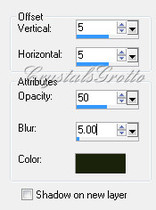
5, 5, 50, 5.00 colour #1b230b (or darker shade of your background colour)
Repeat drop shadow changing Vertical and Horizontal to -5 (minus)
Step 5
Maximise LF-WomanButterflies-07032013,
Edit copy, close original Edit paste as new layer
Image Resize
Repeat drop shadow changing Vertical and Horizontal to -5 (minus)
Step 5
Maximise LF-WomanButterflies-07032013,
Edit copy, close original Edit paste as new layer
Image Resize
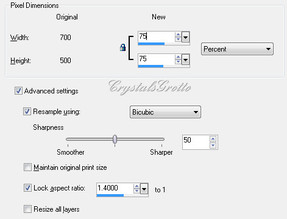
75%, Bicubic, Lock aspect ratio ticked Resize all layers unticked.
Move tube over to right hand side, See header image for placement
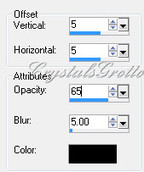
Effects, 3d effects, drop shadow, same settings as above 5, 5, 50, 5.00 #1b230b
Repeat drop shadow changing vertical and horizontal to -5 (minus)
Step 6
Maximise cg-butterflyline-9314-1203 Making sure your on Raster 1, Edit copy, close original
Edit paste as new layer With your move tool, move over to the left hand side
Eraser tool,
Move tube over to right hand side, See header image for placement
Effects, 3d effects, drop shadow, same settings as above 5, 5, 50, 5.00 #1b230b
Repeat drop shadow changing vertical and horizontal to -5 (minus)
Step 6
Maximise cg-butterflyline-9314-1203 Making sure your on Raster 1, Edit copy, close original
Edit paste as new layer With your move tool, move over to the left hand side
Eraser tool,

Round, 24, Hardness 23, step 10, Density and Thickness 100, Rotation 0, Opacity 37
Erase the butterflys over the mosaic on the far left
Erase the butterflys over the mosaic on the far left
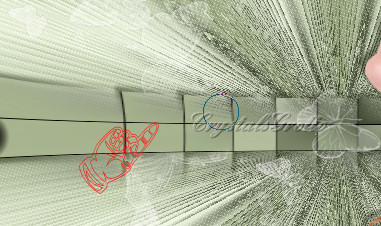
Leaving the large butterfly near the woman tube, it now looks like they are going under and over the mosaic
Effects, 3d effects, Drop shadow
Effects, 3d effects, Drop shadow
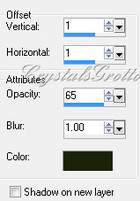
1, 1, 65, 1.00 #1b230b (or again darker shade of your background colour)
Step 7
Change Background colour to #e6d52b, Foreground Null,
With your text tool
Step 7
Change Background colour to #e6d52b, Foreground Null,
With your text tool

ShangrilaNF, size 60, Anti-alias sharp, Create as vector selected
Type - Spring - enter
Layers, convert to Raster layer
Effects 3d effects, drop shadow
Type - Spring - enter
Layers, convert to Raster layer
Effects 3d effects, drop shadow
5, 5, 65, 5.00 Colour Black
Move this to the top, (see header image for placement)
Text tool - same settings as above
Type - Into - enter Move to the left hand side and place on mosaic (see header image for placement) Layers, convert to Raster layer
Effects 3d effects, drop shadow, same settings as above
Text tool, same settings as above Type - Summer - enter Move to bottom (see header image for placement) Layers convert to Raster layer
Effects 3d effects, drop shadow, same settings as above
Step 8
Layers, Merge, Merge All, (Flatten) Image Add border
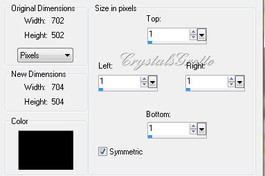
1, symmetric ticked, colour black
Image add border 15, symmetric ticked, Background colour #43581a
Magic wand
Image add border 15, symmetric ticked, Background colour #43581a
Magic wand

Add (shift) RGB Value, Tolerance 0, Use all layers unticked, Contiguous ticked, Feather 0, Anti-alias unticked, Outside
Click on border
Effects, Plugins Bkg Kaleidoscope - Mirrored & scaled, there are no settings here so just click ok Effects 3d effects, Inner Bevel
Click on border
Effects, Plugins Bkg Kaleidoscope - Mirrored & scaled, there are no settings here so just click ok Effects 3d effects, Inner Bevel
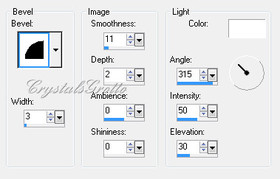
#2, 3, 11, 2, 0, 0, 315, 50, 30 white
Selections Invert Effects 3d effects, cutout
Selections Invert Effects 3d effects, cutout
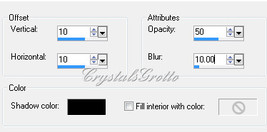
10, 10, 50, 10.00 colour Black
Repeat cut out changing Vertical and Horizontal to -10 (minus)
Selections, select none
Image Add Border 35, symmetric ticked, #e6d52b, same colour as your text.
Select magic wand, same settings as above, (these should already be in your settings)
Select large border
Effects Bkg Kaleidoscope, Mirrored & Scaled - OK Repeat this 3 times more.
Effects 3d effects Inner Bevel, same settings as above, (again these will already be in your settings)
#2, 3, 11, 2, 0, 0, 315, 50, 30 white
Selections Invert
Effects 3d effects drop shadow,
5, 5, 50,5.00 Black
Repeat drop shadow, changing Vertical and Horizontal to -5 (minus)
Selections, Select None
Add your watermark to a new layer
Layers Merge, merge all (flatten)
Image Resize Width 650 pixels, height will adjust automatically. Resize all layers ticked.
Save as Jpeg
That's it we are finally done.
Hope you enjoyed this Tutorial as much as I did writing it
Take a look at what Ruth did with this Tut,
Thank you Ruth its really beautiful.