Diamonds
This Tutorial is solely my own creation, any similarities to anything else is purely coincidental.
Supplies HERE
Cg-diamond-curtain,
Cg-diamond-pattern,
Jewelsparkle-white3.tub
Ponytails-PamelaRamali-gh
Font - Diamond Dust
Plugin - Simple - Diamonds - You can download this HERE
Notes
Before opening PSP, put your jewelsparkle-white3.tub into your Picture Tubes Folder
Plugin - Simple goes into your Plugins Folder
Feel free to choose your own colors, tubes and pattern
Step 1
Open all tubes and minimize for now, Open new canvas,
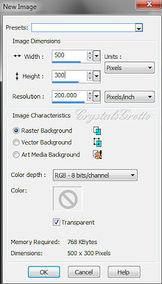
File, New 500 x 300 200 Resolution, Raster Layer
Make Foreground colour #bc8884 and Background #74563a
Make your Foreground a gradient,
Make Foreground colour #bc8884 and Background #74563a
Make your Foreground a gradient,
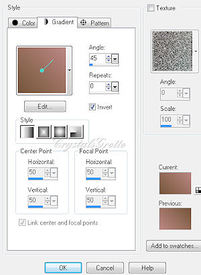
Linear, Angle 45, Repeats 0, Invert ticked
Fill your canvas with your gradient.
Step 2
Maximize cg-diamond-pattern, Make sure you're on the pattern layer
Fill your canvas with your gradient.
Step 2
Maximize cg-diamond-pattern, Make sure you're on the pattern layer

Edit, Copy, you can close this now we won't need it anymore, Back to your canvas,
Edit, Paste as new layer,
Maximize cg-diamond-curtain
Edit copy, you can close this now we won't need it anymore, Back to your canvas,
Edit, Paste as new layer,
Move this over to the left, and up slightly, so bottom of curtain, isn't touching the bottom of image
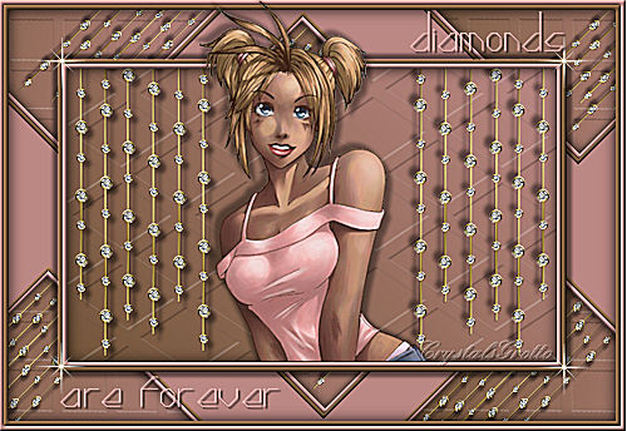
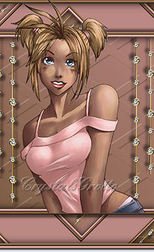
(See header image for placement)
Layers Duplicate, image mirror,
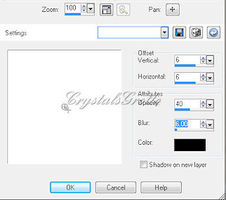
In your layers Palette, highlight left hand curtain, Effects, 3D Effects, Drop Shadow
Edit, Paste as new layer,
Maximize cg-diamond-curtain
Edit copy, you can close this now we won't need it anymore, Back to your canvas,
Edit, Paste as new layer,
Move this over to the left, and up slightly, so bottom of curtain, isn't touching the bottom of image
(See header image for placement)
Layers Duplicate, image mirror,
In your layers Palette, highlight left hand curtain, Effects, 3D Effects, Drop Shadow
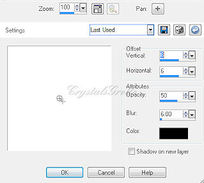
6, 6, 50,6.00, Black
In your layers palette again, highlight the right hand curtain,
Effects, 3D Effects, Drop shadow,
Repeat Drop shadow, But change Vertical and Horizontal to -6 (minus)
Layers, Merge, Merge All (flatten)
Step 3
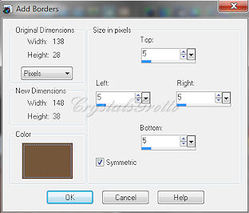
Image add border, Symmetric ticked, 5 Foreground Color,
Selections, Select all, Selections, modify, contract 5
Effects 3D Effects, cutout
In your layers palette again, highlight the right hand curtain,
Effects, 3D Effects, Drop shadow,
Repeat Drop shadow, But change Vertical and Horizontal to -6 (minus)
Layers, Merge, Merge All (flatten)
Step 3
Image add border, Symmetric ticked, 5 Foreground Color,
Selections, Select all, Selections, modify, contract 5
Effects 3D Effects, cutout
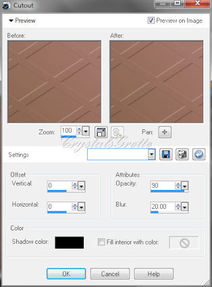
0, 0, 90, 20.00 Black
Selections Invert
Effects, 3D Effects, Inner Bevel,
Selections Invert
Effects, 3D Effects, Inner Bevel,
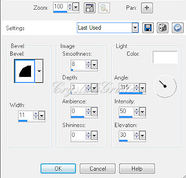
#2, 11, 8, 3, 0, 0, 315, 50, 30, White,
Selections, Select none,
Step 4
Image Add border, symmetric ticked, 5 Background Color,
Selections, Select none,
Step 4
Image Add border, symmetric ticked, 5 Background Color,
With your magic wand, use the settings below
Add (shift), RGB Value, Tolerance 15, Feather 0, Anti-Alias ticked, Outside
Select background border colour
Effects 3D Effects, Inner Bevel, Same settings as first border
Add (shift), RGB Value, Tolerance 15, Feather 0, Anti-Alias ticked, Outside
Select background border colour
Effects 3D Effects, Inner Bevel, Same settings as first border

#2, 11, 8, 3, 0, 0, 315, 50, 30 Selections, select none
Step 5
Image Add border
Step 5
Image Add border
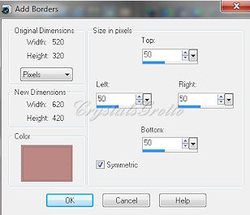
Symmetric ticked,50, Foreground Color
With your magic wand same settings as above, (these settings should already be selected) Select Border
Effects, Simple, Diamonds, Click Apply or Ok Selections, Select None,
Step 6
Image add border,
With your magic wand same settings as above, (these settings should already be selected) Select Border
Effects, Simple, Diamonds, Click Apply or Ok Selections, Select None,
Step 6
Image add border,
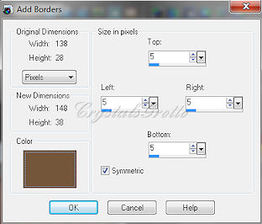
Symmetric ticked, 5 Background Color
Selections Select all, Selections Modify, Contract 5
Effects, 3D Effects, Cut out, 0, 0, 90, 20 Black
Selections Invert,
Effects, 3D Effects Inner Bevel, same settings as above,
#2, 11, 8, 3, 0, 0, 315, 50, 30 Selections, Select None,
Step 7
Image add border, same settings as above just change color to your Foreground Color,
Selections Select, all, Selections modify, Contract, 5
Selections Invert,
Effects 3D effects, Inner Bevel, same settings as above,
#2, 11, 8, 3, 0, 0, 315, 50, 30
Selections Select None,
Step 8
Selections, select all, Selections Modify Contract 60 Effects 3D Effects, Drop Shadow,
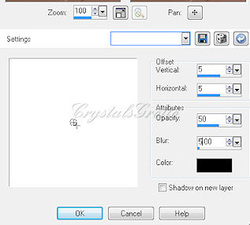
5, 5, 50, 5.00 Black
Repeat drop shadow, but change Vertical and Horizontal to -5 (minus) Selections Select None,
Step 9
Maximize Pontytail-PamelaRamali-gh Over in your layer Palette make sure that Ponytail-PamelaRamali-gh is highlighted
Repeat drop shadow, but change Vertical and Horizontal to -5 (minus) Selections Select None,
Step 9
Maximize Pontytail-PamelaRamali-gh Over in your layer Palette make sure that Ponytail-PamelaRamali-gh is highlighted
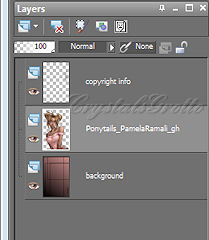
Image Copy, back to your Canvas,
Image Paste as new layer
Image Resize, 90%
Repeat this 3 times more
Move Ponytail tube, so she is just sitting on your first border
This is what you should have now
Image Paste as new layer
Image Resize, 90%
Repeat this 3 times more
Move Ponytail tube, so she is just sitting on your first border
This is what you should have now
Effects 3D Effects, Drop Shadow,
6, 6, 40, 6.00 Black
Repeat Drop shadow, changing Vertical and Horizontal to -6 (minus)
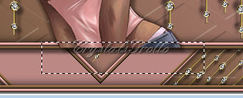
Selection Tool with these settings
Rectangle, Add (shift) Feather 0, Anti-alias ticked,
Using the border as a guide draw a rectangle over Ponytail tube
This is what you should have
Repeat Drop shadow, changing Vertical and Horizontal to -6 (minus)
Selection Tool with these settings
Rectangle, Add (shift) Feather 0, Anti-alias ticked,
Using the border as a guide draw a rectangle over Ponytail tube
This is what you should have
Make sure you are on Ponytail-PamelaRamali-gh layer
Hit delete on your keyboard once,
Selections Select None,
With your Picture Tube Selected, with these settings
Hit delete on your keyboard once,
Selections Select None,
With your Picture Tube Selected, with these settings
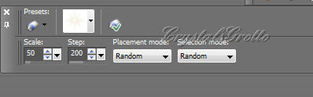
Choose jewelsparkle-white3. Scale 50, step 200 Random, Random,
Layer New Raster Layer,
In each of the corners of first Border add Jewelsparkle.
Step 10
Click on your text tool Foreground #c89b7c Background #f1cbca
Layer New Raster Layer,
In each of the corners of first Border add Jewelsparkle.
Step 10
Click on your text tool Foreground #c89b7c Background #f1cbca

Diamond Cut, 60, Bold ticked, Center, Anti-alias, sharp, Stroke 1 Create as Vector
Type Diamonds, (or text of your choice)
Layers - Convert to Raster
Effects 3D Effects - Drop Shadow
Type Diamonds, (or text of your choice)
Layers - Convert to Raster
Effects 3D Effects - Drop Shadow
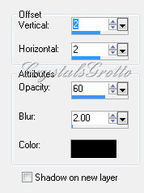
2, 2, 60, 2.00 Black
Repeat Drop Shadow Changing Vertical and Horizontal to -2
Click on your text tool again same settings as above and type
are forever (or text of your choice)
Enter Layers - Convert to Raster
Effects 3D Effects, Drop Shadow, Same settings as above 2, 2, 60, 2.00 Black
Layers, Merge, Merge all Flatten
Image Resize 500 pixels the height will automatically adjust All layers ticked Adjust Sharpness, Sharpen
Add Your watermark on a new layer
Your Done, Hope you enjoyed this tutorial as much as I enjoyed writing it.
