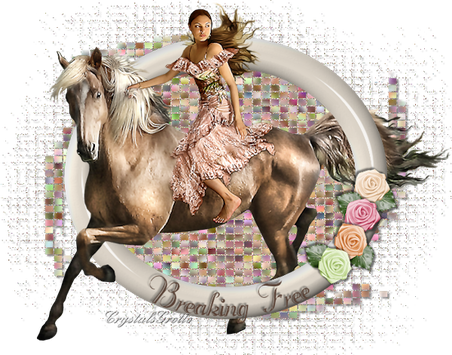
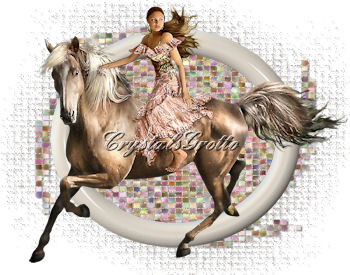
Breaking Free
This Tutorial is solely my own creation, any similarities to another is purely coincidental.
Tutorial was written in PSP 12 but should work in any version.
Tutorial was written in PSP 12 but should work in any version.
The Tube in this Tutorial came from Lisa, Click on the banner to take you to Lisa's site
Thank you so much Lisa for allowing me to use your Tubes.
Supplies - HERE
femmes_0027_lisat
cg-frame-1814-1353
cg-RR-beige-2814-1940
cg-RR-green-2814-1940
cg-RR-peach-2814-1940
cg-RR-pink-2814-1940
Beachman Script Font
Plugins
Penta.com Drag
Penta.com Dot & Cross
Notes: Install your plugins to your plugin folder before opening psp
Open all your tubes and minimize for now
Open your font and minimize to your desktop Windows 7 users will need font viewer
Make Foreground #f5ecdf and Background #7d5d4b
Change Foreground to Gradient
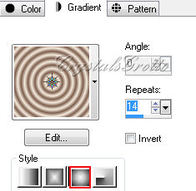
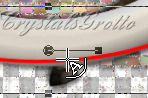
Sunburst (circled in red) Repeats 14
Step 1
Open a new canvas
Open a new canvas
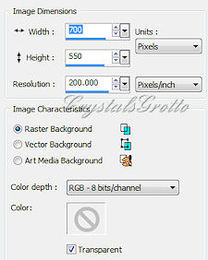
700 550 Raster Background Transparent ticked.
Selection tool, Custom Selection
Selection tool, Custom Selection
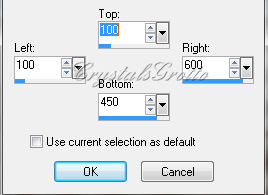
Top: 100, Left 100, Right 600, Bottom 450. OK
Flood fill the selection with your gradient
Do not de-select your selection yet
Step 2
A: Effects, plugins, Penta.com Drag
Flood fill the selection with your gradient
Do not de-select your selection yet
Step 2
A: Effects, plugins, Penta.com Drag
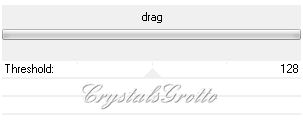
128 - Apply
B: Effects, Reflection Effects, Kaleidoscope
B: Effects, Reflection Effects, Kaleidoscope
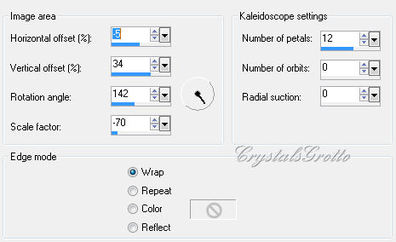
-5 (minus), 34, 142, -70 (minus) 12, 0, 0, Wrap - OK
Selections Select None
C: Effects, Distortion, Ripple
Selections Select None
C: Effects, Distortion, Ripple
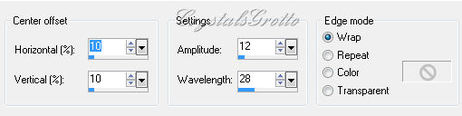
10, 10, 12, 28, Wrap, - OK
D: Adjust, Add/Remove noise, add noise,
D: Adjust, Add/Remove noise, add noise,
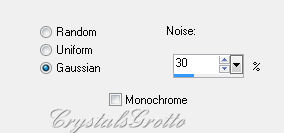
30% Gaussian, monochrome unticked - OK
E: Effects, Distortion, twirl
E: Effects, Distortion, twirl

720 - OK
F: Effects, Plugins, Penta.com Dot & Cross
F: Effects, Plugins, Penta.com Dot & Cross
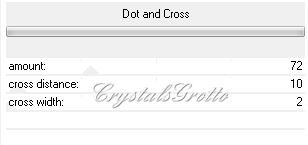
72, 10, 2 - Apply
G: Effects, Texture effects, Mosaic - Antique
G: Effects, Texture effects, Mosaic - Antique
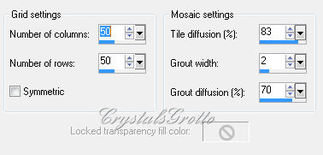
50, 50, 83, 2, 70 - OK
H: Effects, 3d effects, drop shadow
H: Effects, 3d effects, drop shadow
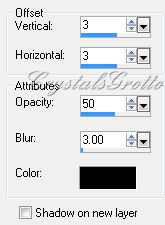
3, 3, 50, 3.00 Black - OK
Step 3
Maximise cg-frame-1824-1353 Edit, copy - back to your canvas -
Edit paste as new layer.
Maximise femmes_0027_lisat Shift D to duplicate, close original
Selection tool, draw a rectangle around watermark Hit delete on your keypad once
Selections, select none.
Edit copy, you can close this now,
A pop up box will ask if you want to save changes to Image, click no
Back to canvas, Edit paste as new layer
Image resize 75%
Move this over to the centre and up slightly This is how I positioned mine
Layers, duplicate
Drag copy raster 3 under your frame layer
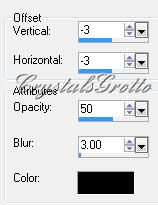
Effects, 3d effects dropshadow
Drag copy raster 3 under your frame layer
Effects, 3d effects dropshadow

3, 3, 50, 5.00 black
Repeat drop shadow changing vertical and horizontal to -3 (minus)
Step 4
Highlight Raster 2 (Frame Layer)
Selections, select all, selections float, selections defloat,
Highlight top layer again,
Eraser tool
Repeat drop shadow changing vertical and horizontal to -3 (minus)
Step 4
Highlight Raster 2 (Frame Layer)
Selections, select all, selections float, selections defloat,
Highlight top layer again,
Eraser tool

Round, 86, 100, 10, 100, 100, 0, 100
Erase the tail and back legs only
(see image below)
Erase the tail and back legs only
(see image below)
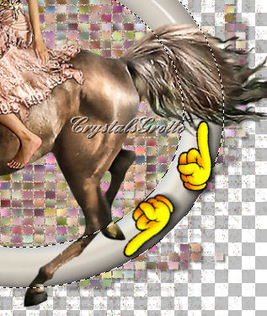
Your eraser will only erase the parts in the selection
Selections Select None
Highlight your frame layer again,
Effects, 3d effects, drop shadow
Same settings as your tube
3, 3, 50, 3.00 Black
Repeat drop shadow changing vertical and horizontal only -3 (minus)
Highlight top layer.
Step 5
Maximise cg-RR-beige-2814-1940 Edit copy, back to your canvas,
Edit paste as new layer
Move this up to the horses tail so that it is sitting in your frame
Give this the same drop shadow as above (Settings should already be in your drop shadow)
3, 3, 50, 3.00 Black Change Vertical and Horizontal only -3 (minus)
Maximise cg-RR-pink-2814-1940 Edit copy, back to your canvas,
Edit paste as new layer
Move this up so that it is sitting in your frame next to your beige rose
Give this rose the same drop shadow as above 3, 3, 50, 3.00 Black
Change Vertical and Horizontal only -3 (minus)
Maximise cg-RR-peach-2814-1940 Edit copy, back to your canvas,
Edit paste as new layer
Move this up so that it is sitting in your frame next to your pink rose
Give this rose the same drop shadow as above 3, 3, 50, 3.00 Black
Change Vertical and Horizontal only -3 (minus)
Maximise cg-RR-green-2814-1940 Edit copy, back to your canvas,
Edit paste as new layer
Move this up so that it is sitting in your frame next to your peach rose
Give this rose the same drop shadow as above 3, 3, 50, 3.00 Black
Change Vertical and Horizontal only -3 (minus)
Step 6
Change Foreground colour to black, background to null
Pen tool
(I have made mine thicker and red so you can see it)

Mode - Draw lines and polylines, create on vector ticked, show nodes ticked, line style solid, width 1.00 Draw a straight line at the bottom of your frame
See image below
See image below
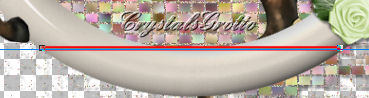
At each end you can see a little square these are our nodes
Right click on your Right hand Node Node Type, Curve before
Now you will see another node has appeared
Right click on your Right hand Node Node Type, Curve before
Now you will see another node has appeared

with your cursor on this node pull it down to bottom slightly
Right click on your Left hand node
Node Type, Curve after Pull this extra node down to bottom slightly
You should end up with something like this See image below
Right click on your Left hand node
Node Type, Curve after Pull this extra node down to bottom slightly
You should end up with something like this See image below
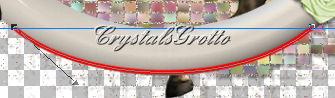
Your straight line is now curved along the bottom of your frame
Change your background colour to #594135 (a darker shade of your background colour)
Text tool
Change your background colour to #594135 (a darker shade of your background colour)
Text tool

Beachman Script, 70, Anti-alias sharp, Create as vector, line style solid
Hover your cursor over the middle of your line Until you see this
Hover your cursor over the middle of your line Until you see this
Click and type Breaking Free
In your layers palette click on the little minus sign on Vector 1 layer
Look for New Path Click the little eye next to that layer (notice that your black line has vanished)
This is how your layer palette should look
In your layers palette click on the little minus sign on Vector 1 layer
Look for New Path Click the little eye next to that layer (notice that your black line has vanished)
This is how your layer palette should look

Layers, Convert to Raster layer
That wasn't too bad was it
Add your drop shadow
That wasn't too bad was it
Add your drop shadow
-3, -3, (minus) 50, 3.00 Black - OK
Add your watermark to a new layer
Image, Resize
Add your watermark to a new layer
Image, Resize
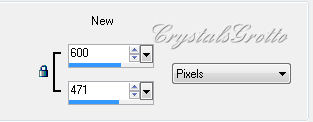
Height 600 pixels,
Width will adjust automatically
Layers, Merge, Merge Visble
Save as a png file
And that's it we are done.
Width will adjust automatically
Layers, Merge, Merge Visble
Save as a png file
And that's it we are done.
