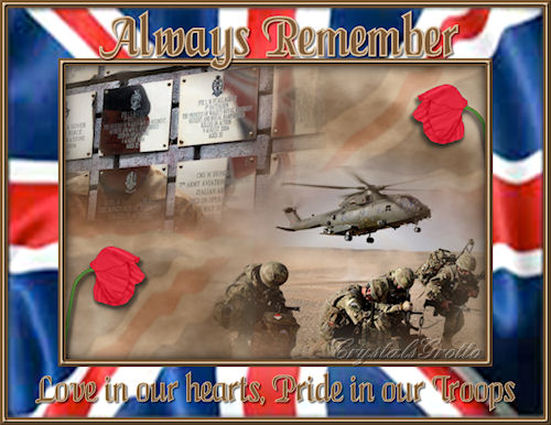
Remember
This Tutorial is solely my own creation, any similarities to another is purely coincidental
Supplies - HERE
Font - MaidenWordCondensed
UJack
Rmbr-wall
Rmbr-Helo
Cg-poppy-remember
MuRa Meister - Cloud - Here
NOTES
Open font and minimize, Windows 7 users will need font viewer
Open all Tubes and minimize for now.
Install MuRa Meister into Plugins Folder before opening PSP
STEP 1
Open New canvas
Font - MaidenWordCondensed
UJack
Rmbr-wall
Rmbr-Helo
Cg-poppy-remember
MuRa Meister - Cloud - Here
NOTES
Open font and minimize, Windows 7 users will need font viewer
Open all Tubes and minimize for now.
Install MuRa Meister into Plugins Folder before opening PSP
STEP 1
Open New canvas
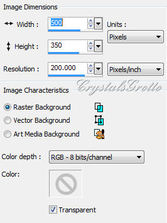
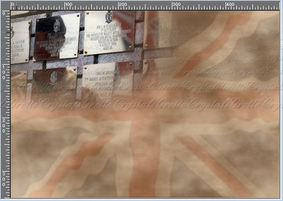
500 x 350 200 Resolution, Raster Background, Transparent ticked.
Choose a light foreground colour #d9be9d, Dark Background #7e5b39
Flood fill with #d9be9d
Effects MuRa Meister - Cloud,
Choose a light foreground colour #d9be9d, Dark Background #7e5b39
Flood fill with #d9be9d
Effects MuRa Meister - Cloud,
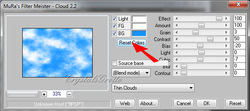
Thin Clouds, Reset Colours, (this will change the colours to your Foreground and Background colours)
Maximize UJack,
Edit Copy Do Not close this we will need it again,
Edit Paste as New Layer
Maximize UJack,
Edit Copy Do Not close this we will need it again,
Edit Paste as New Layer
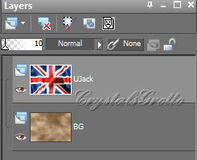
Lower the Opacity to 10
STEP 2
Maximize rmbr-wall,
Edit copy, close original, Over to your canvas,
Edit Paste as new layer,
Move this to the top and over to the left
STEP 2
Maximize rmbr-wall,
Edit copy, close original, Over to your canvas,
Edit Paste as new layer,
Move this to the top and over to the left
Maximize rmbr-Helo
Edit, Copy, close original
Edit Paste as new layer
Move this down and over to the right,
Edit, Copy, close original
Edit Paste as new layer
Move this down and over to the right,
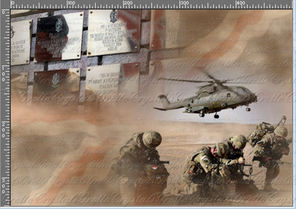
Maximize cg-poppy-remember
Edit Copy, Edit Paste as new layer
Move this to bottom left,
Effects 3d Effects, Drop Shadow
Edit Copy, Edit Paste as new layer
Move this to bottom left,
Effects 3d Effects, Drop Shadow
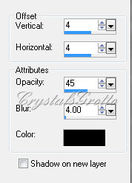
4, 4, 45, 4.00 Black Shadow on new layer unticked,
Layers Duplicate, image mirror,
move up to top and over to right,
This is what you should have now,
Layers Duplicate, image mirror,
move up to top and over to right,
This is what you should have now,
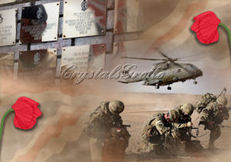
Layers, Merge, Merge All Flatten.
STEP 3
STEP 3
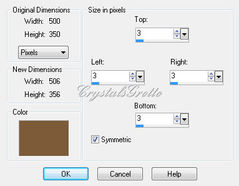
Image Add border, #7e5b39, 3, symmetric ticked,
Image add border, #d9be9d, 3, symmetric ticked,
Image add border, #7e5b39, 3, symmetric ticked,
Selections, Select All,
Selections, modifty, contract 9
Effects 3D Effects, Cutout,
Image add border, #d9be9d, 3, symmetric ticked,
Image add border, #7e5b39, 3, symmetric ticked,
Selections, Select All,
Selections, modifty, contract 9
Effects 3D Effects, Cutout,
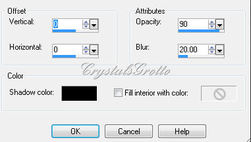
0, 0, 90, 20
Selections Invert,
Effects, 3D Effects, Inner Bevel
Selections Invert,
Effects, 3D Effects, Inner Bevel
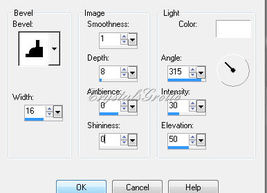
#6, 16, 1, 8, 0, 0, White, 315, 30, 50
Selections, Select None,
STEP 4
Image Add borders,
Selections, Select None,
STEP 4
Image Add borders,
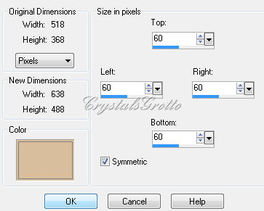
#d9be9d, 60, symmetric ticked.
With your Magic wand, select this large border
Add (shift), RGB Value, Tolerance 25, Contiguous ticked, Feather 0, Anti-alias ticked, Outside
Maximize Ujack
Edit, copy, You can close this now we won't need it again.
Edit paste into selection
Selections, select none.
STEP 5
Image add border, Symmetric ticked, 3, #7e5b39
Image add border, Symmetric ticked, 3 #d9be9d
Image add border, Symmetric ticked, 3 #7e5b39
Selections, Select all, selections, modify, contract 9,
Selections Invert
Effects, 3D effects, Inner Bevel, same settings as before #6, 16, 1, 8, 0, 0, White, 315, 30, 50
Selections, Select none,
STEP 6
With your text tool

MaidenWordCondensed, size 60, Centre, Anti-alias Sharp, Stroke width, 2.0 Vector,
Foreground #d9be9d and background #7e5b39
(Depending on what PSP version you are using you may have to change the size)
Type - Always Remember - Enter
Move this to the top, into the UJack Border,
Objects, Align, Horizontal on canvas,
Convert to Raster Layer,
Effects, 3D effects, Drop shadow, 2, 2, 60, 2.00 Black.
Back to your text tool but we are changing some of our settings

MaidenWordCondensed, size 40, Centre, Anti-alias sharp, Stroke 1.0, Vector,
Foreground #d9be9d and background #7e5b39
Type - Love in our hearts, Pride in our Troops - Enter
Move this down to the bottom UJack border,
Objects Align, Horizontal on canvas, convert to Raster layer
Effects 3D effects, Drop shadow, same drop shadow as last text layer 2, 2, 60, 2.00, Black
Image Resize, with these settings,
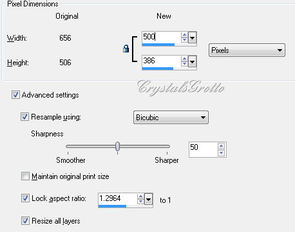
500 Pixels, Height will automatically adjust, Lock aspect ratio ticked, Resize all layers ticked,
Add your watermark,
Layers, Merge, merge all (flatten),
Optional step - Adjust, Sharpness, sharpen.
File export, JPEG Optimiser, compression value 20
Hope you enjoy this tutorial as much as I did writing it,
Dedicated to our Troops Everywhere.
Add your watermark,
Layers, Merge, merge all (flatten),
Optional step - Adjust, Sharpness, sharpen.
File export, JPEG Optimiser, compression value 20
Hope you enjoy this tutorial as much as I did writing it,
Dedicated to our Troops Everywhere.
