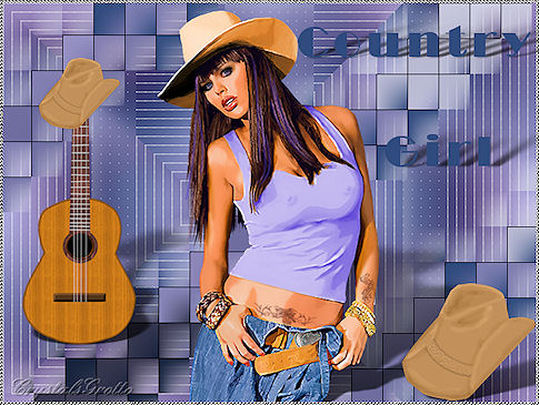
Country Girl
This tutorial is solely my own creation and any similarites to another is purely coincidental
Remember to Save Often.
I would like to Thank Lin for allowing me to use her wonderful Tube in my preview. This is ©Lin but click on Lin's name to take you to her site where she has some wonderful tubes that you can use. All her TOU are there as well so take a few mins to read them.
Remember to Save Often.
I would like to Thank Lin for allowing me to use her wonderful Tube in my preview. This is ©Lin but click on Lin's name to take you to her site where she has some wonderful tubes that you can use. All her TOU are there as well so take a few mins to read them.
SUPPLIES - HERE
You will need a Tube of your choice, Lin has some lovely ones on her site
Silver Beads fill
Cg-guitarhat
Cg-hat
Broadway Bold Font
Plugins
Mehdi-WavyLab1.1
Simple - Pizza Slice Mirror
AP Lines - Lines Silverlining
Italian Editors Effects - Skew
Toadies, Plain Mosaic Blur
Eye Candy 5 Impact - Perspective Shadow
All Plugins can be found HERE
NOTES
Cg-guitarhat was made by me
Open Font and Minimize to your desktop, (Windows 7 users will need a font viewer)
Save your Silver Beads Fill to your patterns folder
Save your plugins to your plugins folder before opening PSP
Feel free to use your own supplies
STEP 1
Open a new canvas
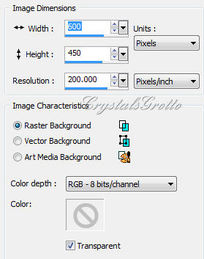
600, 450, 200.00, Raster Background, Transparent ticked.
Change Foreground to #304b7e and Background to #c7bef1
A
Effects, Mehdi, Wavy lab 1.1
Change Foreground to #304b7e and Background to #c7bef1
A
Effects, Mehdi, Wavy lab 1.1
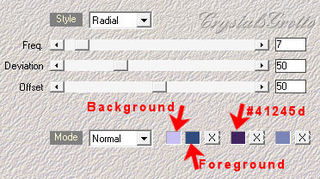
Style Radial, 7, 50, 50, Mode Normal, #c7bef1 (background) #304b7e (foreground) #41245d leave last box Adjust Blur, Gaussian Blur 30.00
B
Effects, Ap [lines], Lines - Silverlining
B
Effects, Ap [lines], Lines - Silverlining
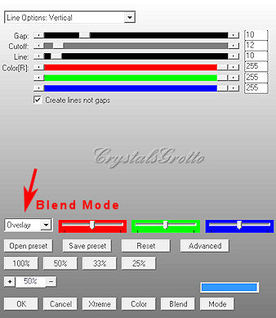
Line Options, Vertical, Gap 10, Cutoff 12, Line 10, Bottom 3 Colours 255, Create Lines not gaps ticked, Blend Mode Overlay
Layers, Duplicate, Image Flip, In your layers Palette lower the opacity to 50 Layers, Merge, Merge Down
C
Effects, Simple, Pizza Slice Mirror
Layers, Duplicate, Image Flip, In your layers Palette lower the opacity to 50 Layers, Merge, Merge Down
C
Effects, Simple, Pizza Slice Mirror
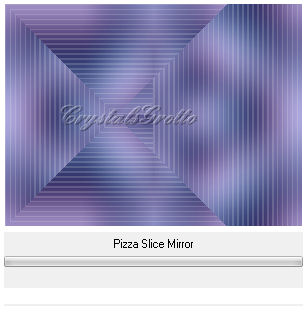
There are no settings here
Apply
Selection tool, custom Selection
Apply
Selection tool, custom Selection

Rectangle, Add (shift) Feather 0, anti-alias ticked, click the custom selection box
Now this box will open
Now this box will open
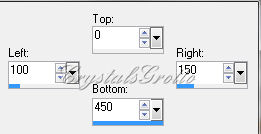
Top 0, Left 100, Right 150, Bottom 450
OK
Adjust Blur, Gaussian Blur
OK
Adjust Blur, Gaussian Blur
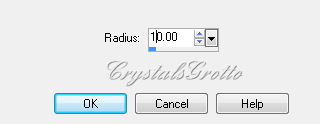
10 - OK
Selection Tool same settings as above,
Custom Selection Change only Left 250, Right 350, - Top and bottom stay the same as above
Adjust Blur, Gaussian Blur, same settings as above, 10,
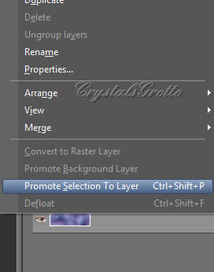
Over in your Layers Palette, right click on Raster 1
From the fly out box click Promote selection to layer
Selection Tool same settings as above,
Custom Selection Change only Left 250, Right 350, - Top and bottom stay the same as above
Adjust Blur, Gaussian Blur, same settings as above, 10,
Over in your Layers Palette, right click on Raster 1
From the fly out box click Promote selection to layer
Highlight Raster layer 1
Selection tool, same settings as above,
Custom Selection Top and bottom settings remain the same,
Left 450, Right 500
Adjust Blur, Gaussian Blur 10
Selections Select none,
STEP 2
Highlight Promoted Selection layer Effects, 3d Effects, Drop Shadow
Selection tool, same settings as above,
Custom Selection Top and bottom settings remain the same,
Left 450, Right 500
Adjust Blur, Gaussian Blur 10
Selections Select none,
STEP 2
Highlight Promoted Selection layer Effects, 3d Effects, Drop Shadow
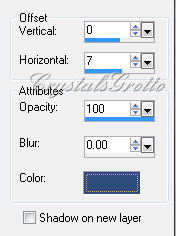
0, 7, 100, 0.00 #304b7e
Repeat Drop Shadow changing Horizontal only to -7 (minus)
A
Effects, It@lian Editor Effects, Borda Con Luci
Repeat Drop Shadow changing Horizontal only to -7 (minus)
A
Effects, It@lian Editor Effects, Borda Con Luci
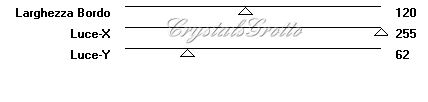
120, 255, 62 - OK
Effects, Geometric Effects, Skew,
Effects, Geometric Effects, Skew,

Horizontal checked, skew angle 45, transparent checked.
B
Effects, Toadies, Plain Mosaic Blur
B
Effects, Toadies, Plain Mosaic Blur
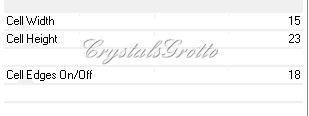
15, 23, 18
Layers, Duplicate,
Move this to the bottom right hand corner,
You can move this layer up or down until you have the colours you want showing
Highlight Promoted Selection Layers Duplicate,
Move this to the top left hand corner,
You can move this layer up or down until you have the colours you want showing
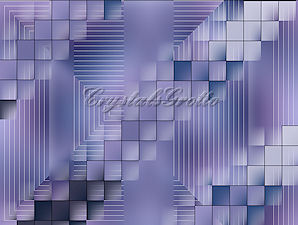
Here is how my Image looks like now
Layers, Duplicate,
Move this to the bottom right hand corner,
You can move this layer up or down until you have the colours you want showing
Highlight Promoted Selection Layers Duplicate,
Move this to the top left hand corner,
You can move this layer up or down until you have the colours you want showing
Here is how my Image looks like now
In your layers palette, hide Raster layer 1 by clicking on the little eye Layers,
Merge, Merge Visible
Merge, Merge Visible

Unhide Raster layer 1 by clicking the little eye again.
STEP 3
Highlight Raster 1 Effects AP [Lines] - Lines Silverlining
STEP 3
Highlight Raster 1 Effects AP [Lines] - Lines Silverlining
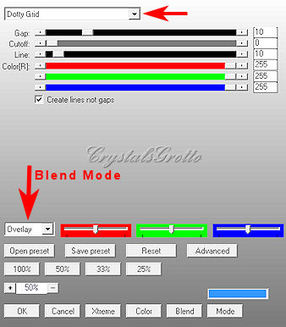
Dotty Grid Gap 10, Cutoff 0, Line 10, bottom 3 colours 255, Blend Mode Overlay
OK
STEP 4
Highlight Merged layer
Maximize your Tube,
Edit copy,
You can close this now Edit paste as new layer,
Image Resize
OK
STEP 4
Highlight Merged layer
Maximize your Tube,
Edit copy,
You can close this now Edit paste as new layer,
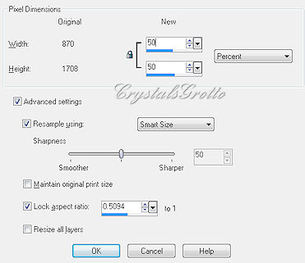
Image Resize
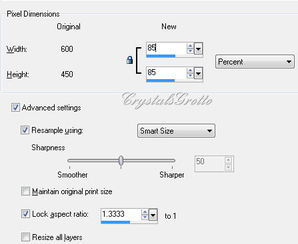
85%, Smart Size, Resize all layers Not ticked.
Effects, Eye Candy 5 Impact - Perspective Shadow
Effects, Eye Candy 5 Impact - Perspective Shadow
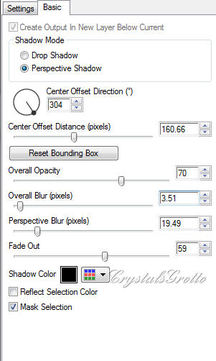
Perspective Shadow Checked, Center Offset Direction 304, 160.66, 70, 3.51, 19.49, 59, Black,
Mask Selection Ticked
STEP5
Maximize cg-guitar-hat, Edit Copy,
You can close this now
Edit Paste as new layer,
Image Resize
Mask Selection Ticked
STEP5
Maximize cg-guitar-hat, Edit Copy,
You can close this now
Edit Paste as new layer,
Image Resize
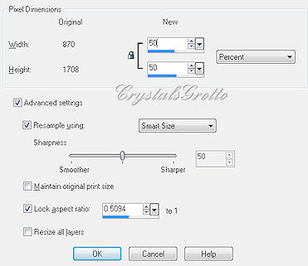
50%, Smart Size, Resize all layers Not ticked.
Repeat Resize 50%
Image Resize, 85%, all other settings remain the same.
Move over to the left hand side and up slightly.
Effects Eye Candy 5 Impact, Perspective Shadow Same settings as above,
Perspective Shadow Checked, Center Offset Direction 304, 160.66, 70, 3.51, 1949, 59, Black,
Mask Selection Ticked
STEP 6 Maximize cg-hat Edit Copy, You can close this now Edit Paste as new layer, Image Resize
50%, Smart Size, Resize all layers Not ticked.
Repeat resize at 70%, smart size, Resize all layers Not ticked.
Move over to the right hand side and down to bottom
Effects Eye Candy 5 Impact, Perspective Shadow Same settings as above,
Perspective Shadow Checked, Center Offset Direction 304, 160.66, 70, 3.51, 1949, 59, Black,
Mask Selection Ticked
STEP 7
Layers, Merge, Merge All (flatten) Image, Add border
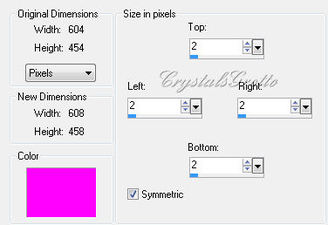
2, Symmetric ticked, colour not in your image.
Selections, Select all, Select Modify, Contract 2,
Selection Invert
Change Foreground to Pattern and look for the Silver Beads that we saved earlier.
Flood fill selection with silver beads pattern
Selections, Select all, Select Modify, Contract 2,
Selection Invert
Change Foreground to Pattern and look for the Silver Beads that we saved earlier.
Flood fill selection with silver beads pattern
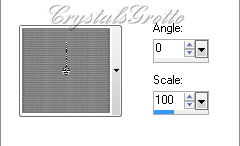
Angle 0, Scale 100
Effects, Edge Effects, Enhance Effects, Edge Effects, Enhance.
Selections, select none,
STEP 8
Select Text Tool
Effects, Edge Effects, Enhance Effects, Edge Effects, Enhance.
Selections, select none,
STEP 8
Select Text Tool

Broadway, 50, Bold Highlighted, Center, Anti-alias sharp, Stroke 0.0, Vector, line Style Solid
Type, Country
Layers Convert to Raster Layer,
Move this to the top Right hand side
Effects, Eye Candy 5 Impact, Perspective Shadow
Type, Country
Layers Convert to Raster Layer,
Move this to the top Right hand side
Effects, Eye Candy 5 Impact, Perspective Shadow
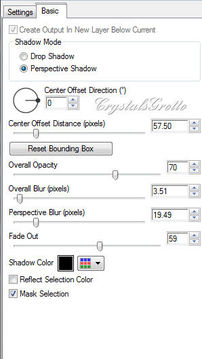
Perspective Shadow ticked, Center Offset Direction 0. 57.50, 70, 3.51, 19.49, 59 Colour Black,
Mask Selection ticked.
Text Tool again, Setting same as above,
Type, Girl
Layers, Convert to Raster Layer, Move this to the middle right hand side.
Effects, Eye candy 5 Impact, Perspective shadow Same settings as above,
Add your watermark as a new layer Layers, Merge, Merge All (flatten)
Save as a Jpeg
That's it we are done.
Hope you enjoyed this tutorial as much as I did writing it for you
